OUR PROJECTORS
- NEC M323W
THINGS TO CONSIDER
The processes is very similar to calibrating a computer monitor, please reference “How To - Calibrate” to become familiar with the object and application.
PREPARING THE ROOM FOR CALIBRATING
When preparing to calibrate, there are a number of areas that need to be prepared. You want the lighting in the room to be exactly how it typically is. So that means if the lights are typically off in the room for example you would keep them off. If the doors are typically closed then keep them closed when you calibrate.
RETOUCHING ROOM
-Overhead lights off
-Two desk lights on
-Door between the Retouching Room and the Ordering Session Room are closed during the winter. Door can be open the rest of the year. Really use the lighting conditions that you are currently using. So if the door to the OS room is always closed and the other is always open, then go with that.
ORDERING SESSION ROOM
-Light off
-Both doors closed
STUDIO
-Overhead lights are off
PACKING AREA
All lights are on. Right now we are not calibrating Sad as we don’t have Photoshop on the Packing Room computer.
CALIBRATING DISPLAYS
X-Rite Color Munki Display
TAKE OUT THE CALIBRATION DEVICES
We have four calibrators. These devices are located on the shelf above the servers in the Retouching Room. They are in a clear bin that is labeled Color Calibrators. You will want to take the box out and choose to use the newest devices which are the “Calibrate/Color Checker Display Pros” (orange and blue) as you can have both running on different computers at the same time.
The calibrators that we use are:
-Calibrate/ColorChecker Display Pro x 2 (Orange, Blue)
Older Calibrators
-X-Rite / Pantone i1 Display Studio Calibrator x 1 ( Green)
-X-Rite / Pantone Color Munki Display Calibrator x 2 (one retired)
Included a few links below for additional information about the product. Check for updates every so often. When there is an update ask Nate if its ok to update software before doing so. Do not update software unless there is a need to. For example there is issues with the current software.
Links to product info:
Calibrate ColorChecker Display Pro
i1 Color Display
X-Rite Color Munki Display
Links to original receipts for calibrators in case there are issues:
053013 X-Rite Color Munki Display Calibrator
123017 X-Rite Color Munki Display Calibrator
112520 X-Rite i1 Display Studio EODISSTU
071423 Calibrate ColorCheck Display Pro Calibrator x 2
STEP 1 I TAKE THE CALIBRATOR OUT OF THE BOX
Take the Calibrator out of the box and rotate it so the lens is facing outwards. The lens should be facing the the projector screen or wall.
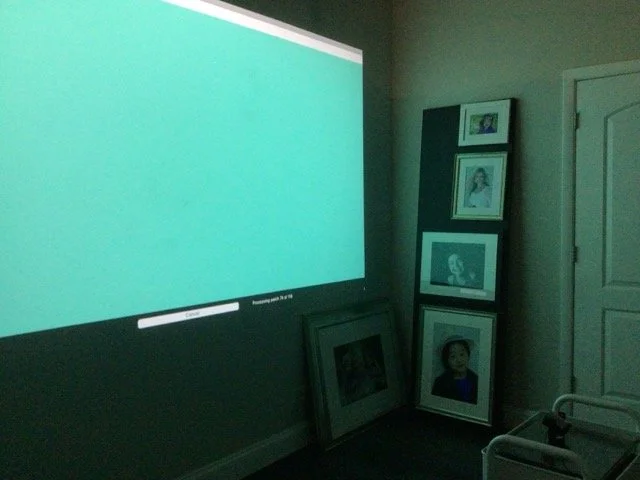
STEP 2 I PLACE THE CALIBRATOR IN FRONT OF PROJECTION
Place Calibrator color checker on flat surface, like the mobile cart in the ordering session room. Adjust the weight on the cord to get the right fit. Beware if color checker is not directly in the middle of the projection measurements and accuracy will vary. CCProfile will often make you aware if color checker is centered.
Place the front of the calibrator (lens side) in pointing to projection display.
Make sure that the calibrator is sitting completely flat.
Plug the USB end of the calibrator into the computer. Do not plug the USB into the projector itself. There is a USB to USB-C dongle in the plastic case under Lolly South.
NOTE: When calibrating, Make sure there is no external movement that could possilbly shake the table while calibrating. Example: Passing trains, printing, construction nearby, or bumping the table.
STEP 3 I LAUNCH THE i1 DISPLAY STUDIO APP

Launch the CC Profiler Application. It should be located in the dock. Or go to Finder —> Finder —> Applications —> CCProfiler Application.
STEP 4 I CHOOSE CALIBRATION OPTIONS
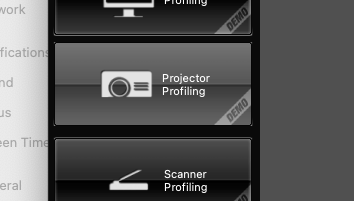
Click on the image that shows the calibrator on the right side of the screen. Then click on the “Projector” icon on the left side of the screen.
STEP 5 I CALIBRATION SETTINGS (STANDARD SETTINGS)

CHOOSE YOUR DISPLAY”S TARGER WHITE POINT AND LUMINANCE
Click "Next"
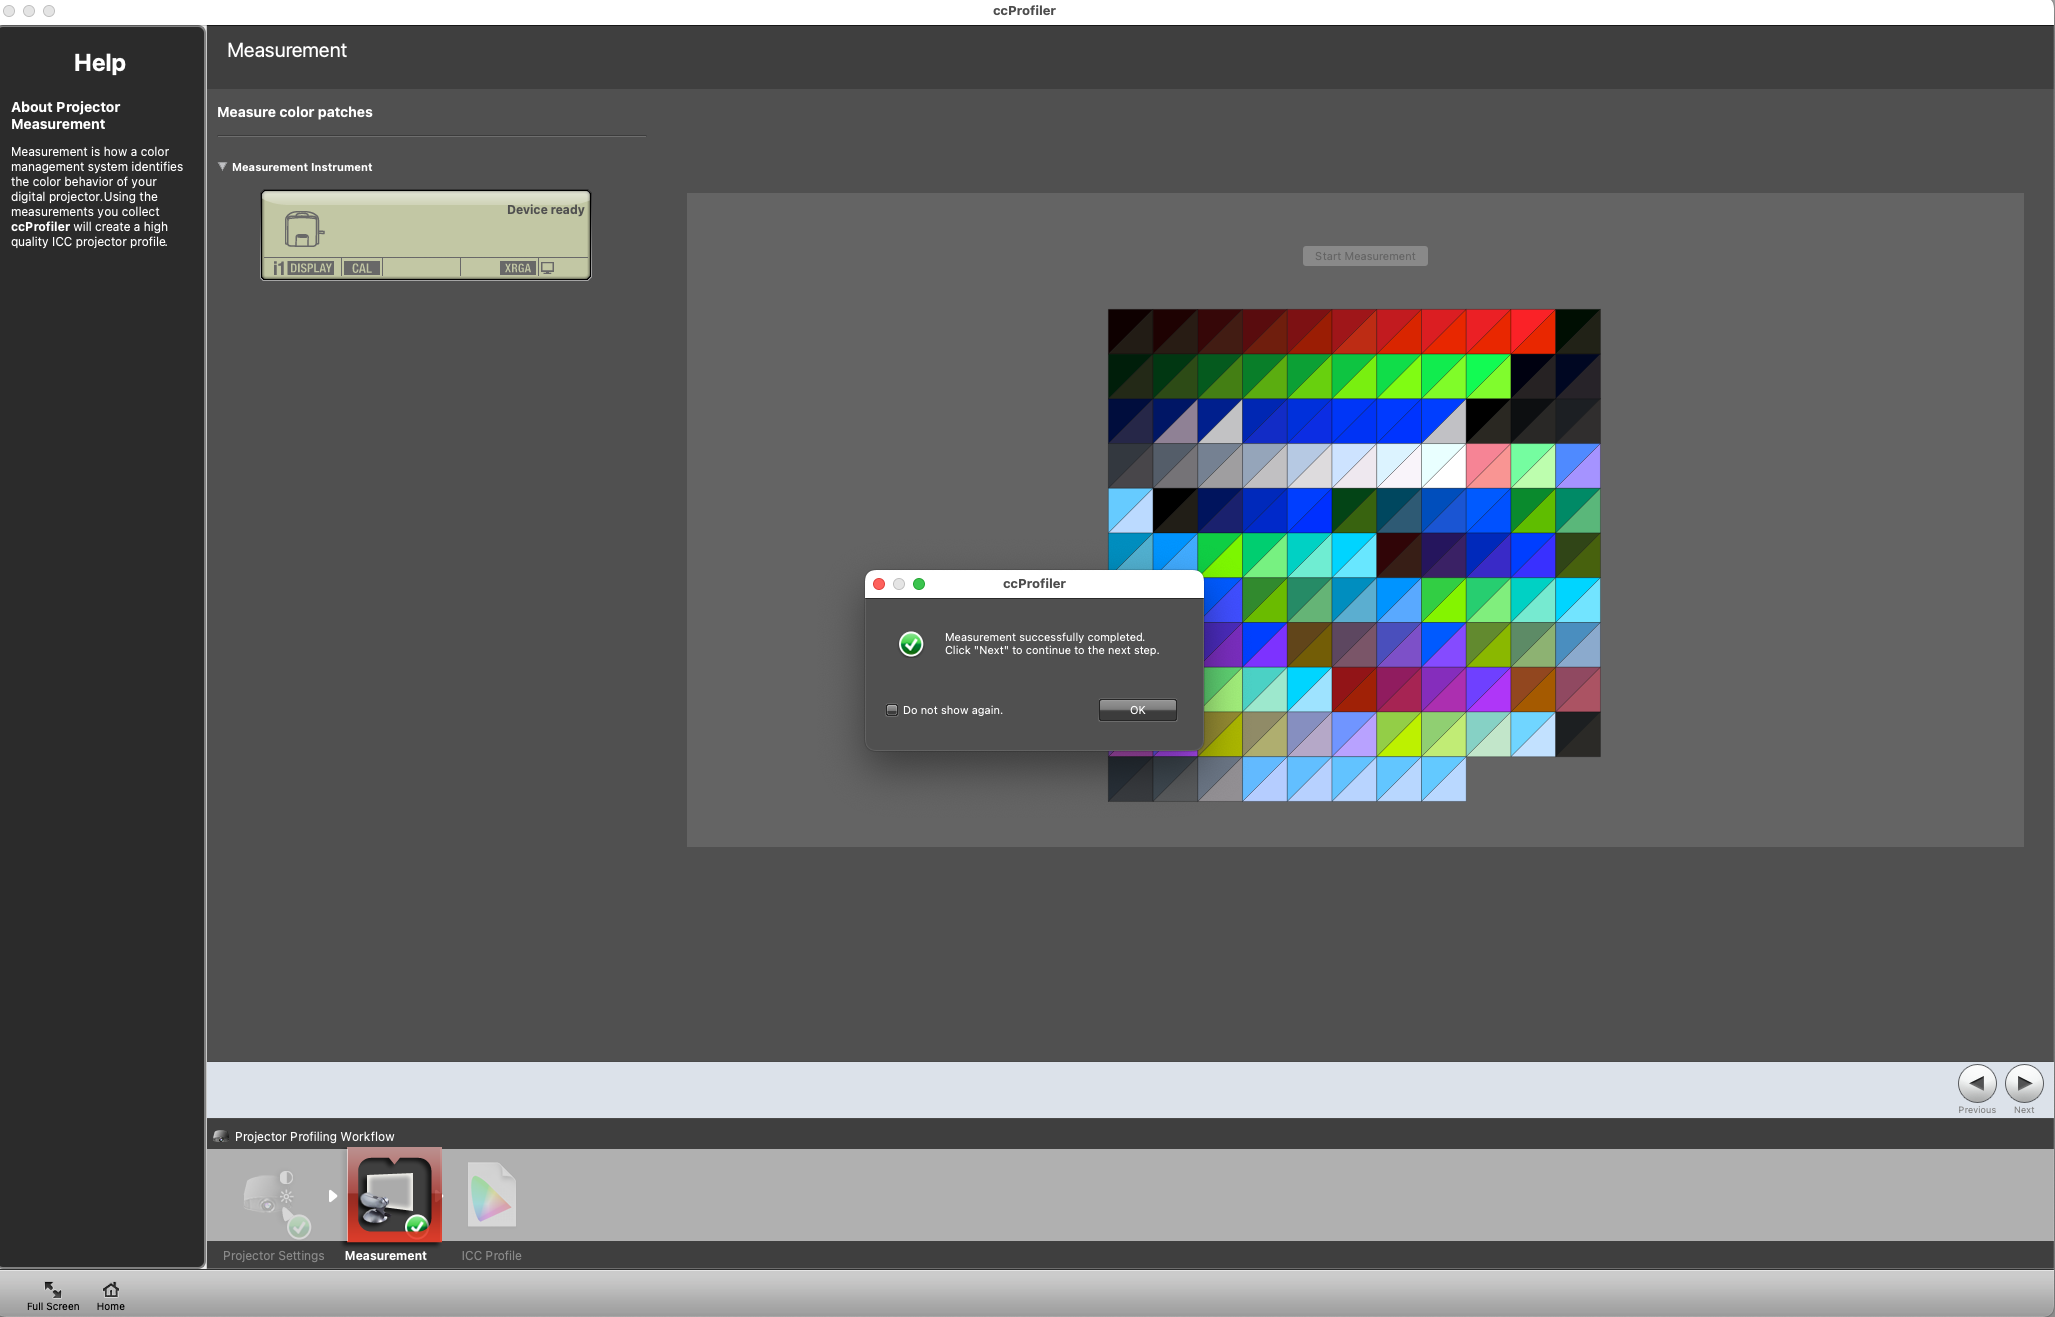
STEP 6 I CALIBRATION SETTINGS I MEASURE COLOR PATCHES

-Measurement Instrument: Device Ready
THEN CLICK START MEASUREMENT PROCESS. This process is very quick, , maybe about 30 seconds and only pops up a few colors.
STEP 7 I COLOR CALIBRATION

**The CCProfile will automatically calibrate the projector unlike manually doing it with the displays.
The color calibration step will take about 5 minutes and you will not be able to do anything else on the computer. Go work on another project while this display is calibrating. Or see if the other calibrator is ready for the next step.
If you are using two displays, you are able to continue working on the other display.
STEP 8 I CLICK FINISH
The software will go through 118 color swatches. This take a minute or two.
Once completed, click next and it will bring you back to this screen.
Click Next.
STEP 9 I SAVE PROFILE NAME
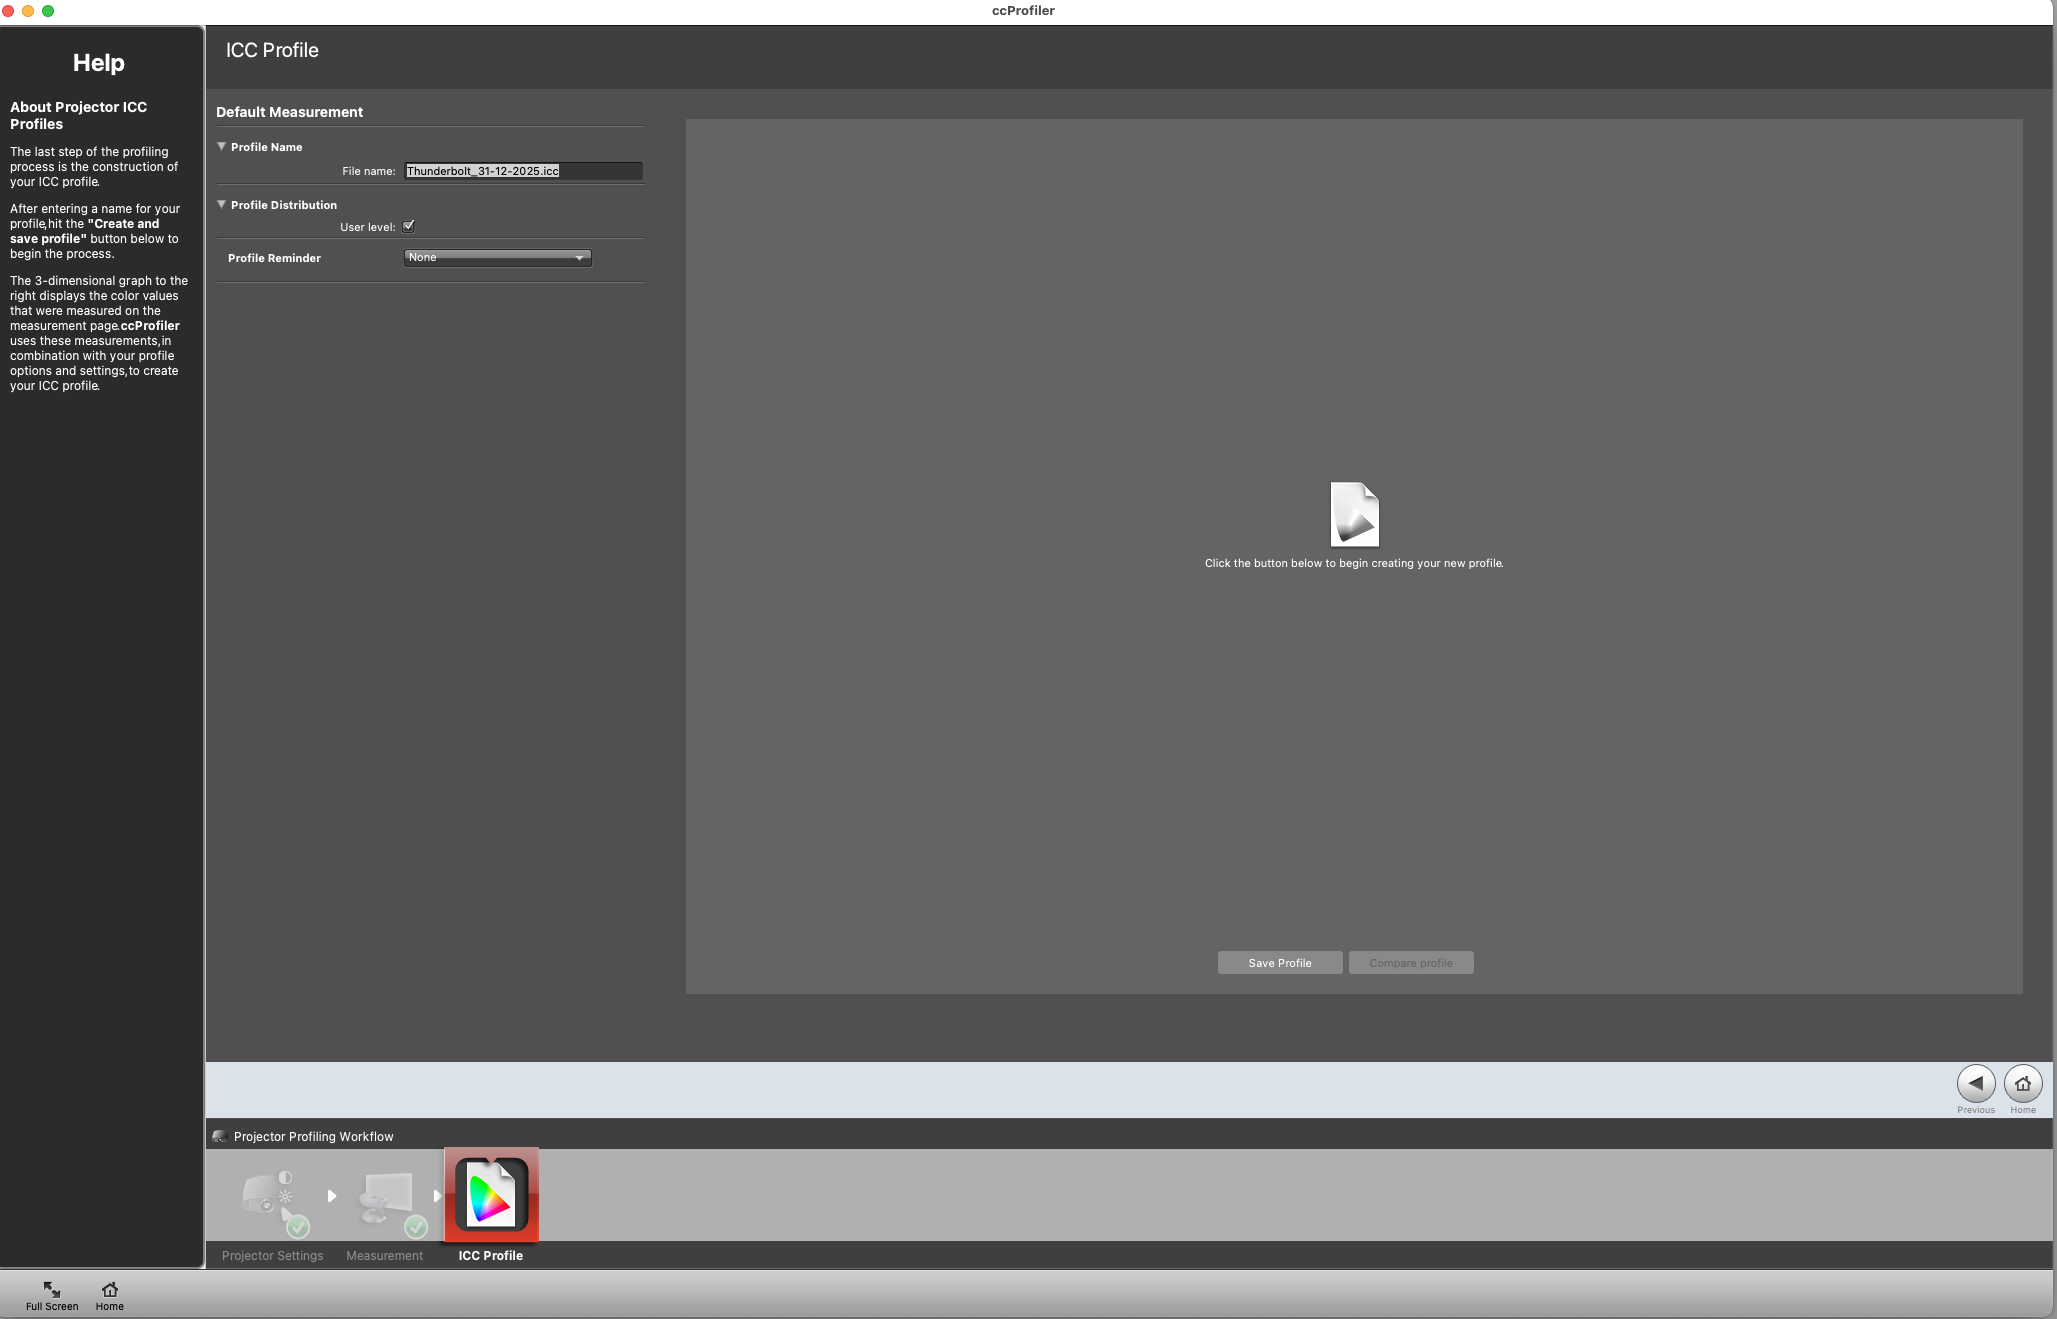
Save the file as: DDMMYY Projector.icc
Example: 100924 Log Thunderbolt.iccSet reminders for “None”
Click Save
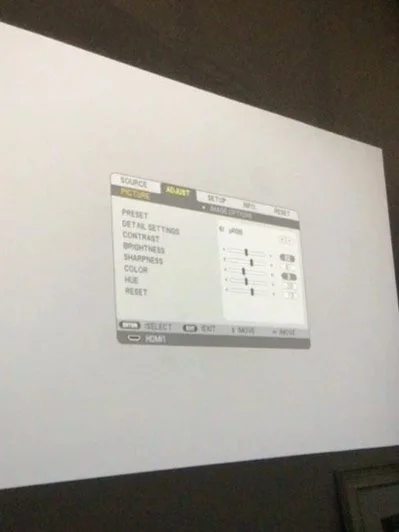
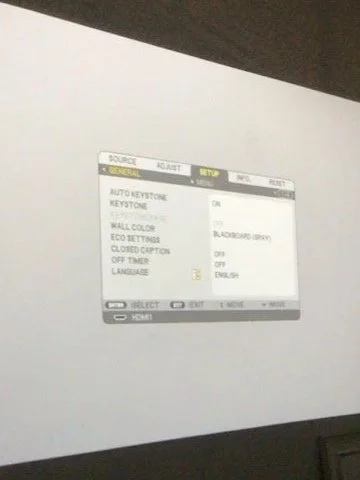
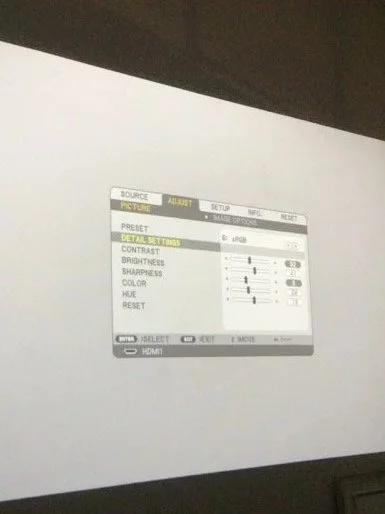
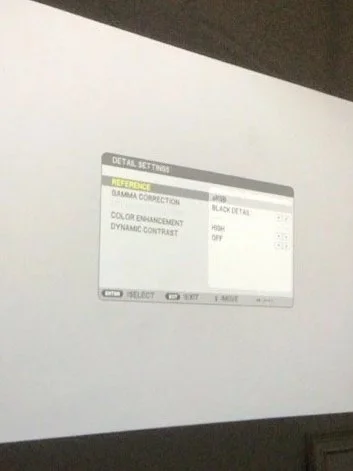
STEP 10 I PROJECTOR SETTINGS
Go to the menu on the project and make sure the following is correctly adjusted:
“Detail Settings”
“Gamma Correction” = Black Detail
“Brightness” = 41
“Hue” = 19
“Color” = 28
“Wall Color” = Blackboard “Gray”